|
|
August 14, 1999
Step 3: Wire up the Motor
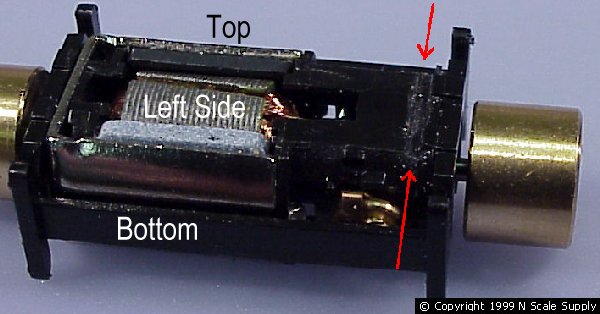
The motor contains two brushes, one on top and one on the bottom. Running the wire to the bottom brush will require making a slight groove in the side of the motor casing. Again, I used my hack saw, very lightly drawing it across the casing as shown below. Only a couple of passes are needed. Hold one of the leads from the DZ121 into the grove and make sure it does not protrude further than the edge of the motor casing.

Next, take the motor housing clip off the motor and gently pry the two brush caps out of the motor. Be careful that you do not fling the cap, spring or brush across the room (voice of experience here).

Find the Orange and Gray leads on the DZ121, cut the Orange one to just slightly longer than 1" and the Gray to 1-7/8". Strip about 1/8" of insulation from each.
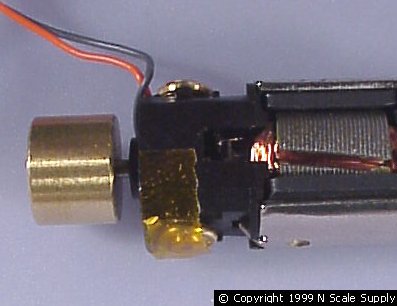
With the brush and spring removed from the brush cap solder the wires as shown above to the bronze contact strips that are attached to the brush caps. Clip off the excess length of the bronze strips.

Reassemble the brushes into the motor, make sure the Orange one is on the side of the motor you marked Top Right. Cut a couple of strips of Kapton tape and cover each brush cap (I use the Kapton tape that comes with the Plug n' Play Board decoders).

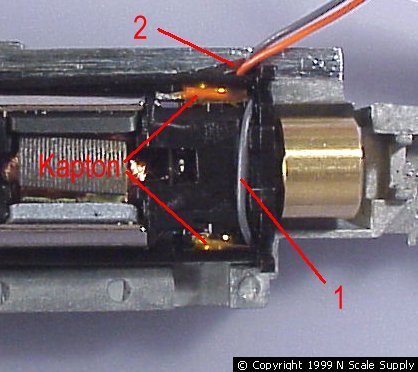
Reinstall the motor housing clip routing the gray and orange wires as shown above ( #1 in the above picture). Then install the motor into the right frame half. I found that I needed to file a notch in the top of the frame to clear the wiring ( #2 in the above picture).

Finally, oil the bearings and make sure everything spins easily.